A Five Step Guide to Fibreboard Underlay Installation
Posted by Chloe Smith on
You’ve decided on a beautiful brand new laminate floor or hardwood flooring and being someone who loves DIY, figure you will save yourself a few pounds by preparing the subfloor and laying the fibreboard underlay ready for the installation. But this is new to you, and you need a helping hand to make a start.
Don’t worry - here at Buy Carpet Underlay, we've devised a simple five point step by step guide to installing fibreboard underlay!

Step 1 - Acclimatise the Fibreboard
Before installing your new fibreboard underlay, you will need to allow it to adjust to the temperature and humidity of the room you plan to install it in. This is an essential pre installation step as it will significantly reduce the risk of your underlay either shrinking or expanding after installation and will ensure the best possible result. To do this, you should keep the fibreboard in the packaging it arrived in and place each pack roughly in the centre of the room to allow air to circulate around each pack. The underlay should be left like this for a minimum of 48 hours before you begin the installation process.
Step 2 - Prepare your subfloor
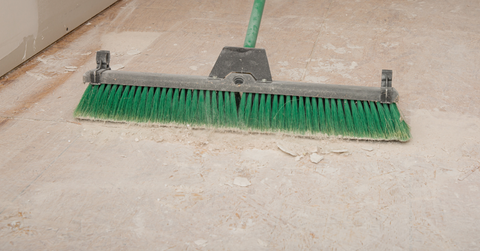
The next step is to prepare the subfloor of the room in which you intend to lay your underlay. One of the many features of fibreboard is that it is specifically designed to counter imperfections in the subfloor such as cracks or bumps. Fibreboard will significantly help to level out uneven subfloors, but make sure the floor is debris free, clean, and dry. You can achieve this by using either a hoover or a simple brush to remove any dust, debris and nails leftover from the previous flooring installation.
Step 3 - Add a damp-proof membrane (DPM) to your subfloor
(Recommended particularly for concrete floors)
If your subfloor is made purely from wood with the standard floorboard construction and is damp free then you may feel you can by-pass this step. However, if you are concerned about rising damp or should your subfloor be constructed of concrete then it is a worthwhile precaution to add a damp-prove membrane on to your floor before underlay installation commences.
You might be wondering what a damp-proof membrane actually does, and basically it is what it says. It is a thin layer, sometimes plastic or foil that creates an additional damp proof barrier and stops moisture from rising from the subfloor, through the underlay and ultimately into your newly finished flooring. Clearly should this happen, you will find your flooring will buckle and move and a new floor is likely to be required.
To install a damp-proof membrane (DPM) simply lay the DPM across your floor over the full area of the subfloor and cut it to the correct size leaving a 50mm border around the edge.
** Be mindful of new concrete floors** Newly laid concrete takes time to dry thoroughly. It is recommended that your concrete dries out one day per each millimetre thickness of concrete. So if your concrete floor is 90mm thick then this will need a 90 day drying period. Of course, this can be increased and decreased depending upon the environment and area the concrete is laid.
You can also buy tools that help you read the amount of moisture in the floor. Some give you a percentage of moisture others simply a green for pass or a red for fail.
Step 4 - Lay the first row of Fibreboard
Now lets get down to business, the preparation is complete and you want to start laying the actual fibreboard underlay! Fibreboard comes in sheets with a longer length and a smaller width, usually about 85mm x 59mm. Each separate sheet should be loosely placed at a 90° angle to the direction that your new flooring is going to be laid. Usually wood and laminate floors are laid along the length of the room rather than across the shorter width.
So if this is how you intend to lay your flooring, start in the corner of the room. Leave a small 10mm gap between your underlay and the wall and lay your first piece of fibreboard. The longer length of fibre board should follow the width of the room. Once you've correctly positioned the first piece, leave an expansion gap of approximately 2mm between the first and second sheet and fill the row across the width with fibreboard. It is likely that your final piece will have to be cut to fit perfectly.

Step 5 - Repeat the process
The next and final step of the installation is to lay the rest of the underlay, covering the entire floor space. To do this, simply repeat the above process from step 4 until you have covered the entire floor with underlay. For any doorways or architraves, measure the area and cut the fibreboard to size using a sharp cutting knife.
Get in touch!
So, there you have it, your floor is ready for the laminate flooring or wood to be installed leaving you with a fantastic floor which gives a modern luxurious feel and years of excellent wear. You also now have the knowledge to install fibreboard underlay! You'll soon be able to promote yourself from a DIY’er to a self made pro very soon and get on with doing the rest of the house. However, if you are still unsure and want further advice then we're always happy to help! You can give us a call on 01924 457979 or alternatively drop us an email at sales@buy-carpet-underlay.co.uk.
Share this post
- Tags: Fibreboard, Fibreboard Underlay, Floor, Flooring, Flooring Underlay, Laminate, Laminate Underlay, Underlay